· 4 min read
How To Use Photon Solana Trading Platform
Here's a short tutorial on how to trade coins on Photon!
What is Photon?
Are you tired of missing out on the meme coin run because of slow trading on Raydium? Well what if I told you there was a better and faster way to trade?
There is, and it’s called Photon, built by TinyAstro. Photon improves the trading experience on Solana, by providing a faster way to buy and sell coins. It’s similar in speed to a Telegram bot such as Trojan but gives you the ease of use of a web application.
Let’s dive right into how you can start trading with Photon 👇
Why should I use Photon?
You might be wondering, “Jupiter works great when trading coins, why would anyone need to use Photon?”
The answer is simple. You get a competitive advantage with Photon. With meme coins, a few seconds make a huge difference in token price. Photon has multiple advantages over Raydium or Jupiter:
- Snipe, buy, and sell in one click without ever having to another platform to trade.
- Get instant access to important token data such as:
- Creation time
- Liquidity
- Market Cap
- Transactions
- Volume
- Mint Auth
- LP Burn
- Top 10 Holder Percentage
- Customize slippage settings and priority fees to ensure trades go through.
How Do I Use Photon?
Ready to start trading on Photon? Perfect, let’s get you set up.
Trading meme coins on Photon or any decentralized platform is risky and you should only use what you can afford to lose.
Step 1: Generate a Photon Wallet
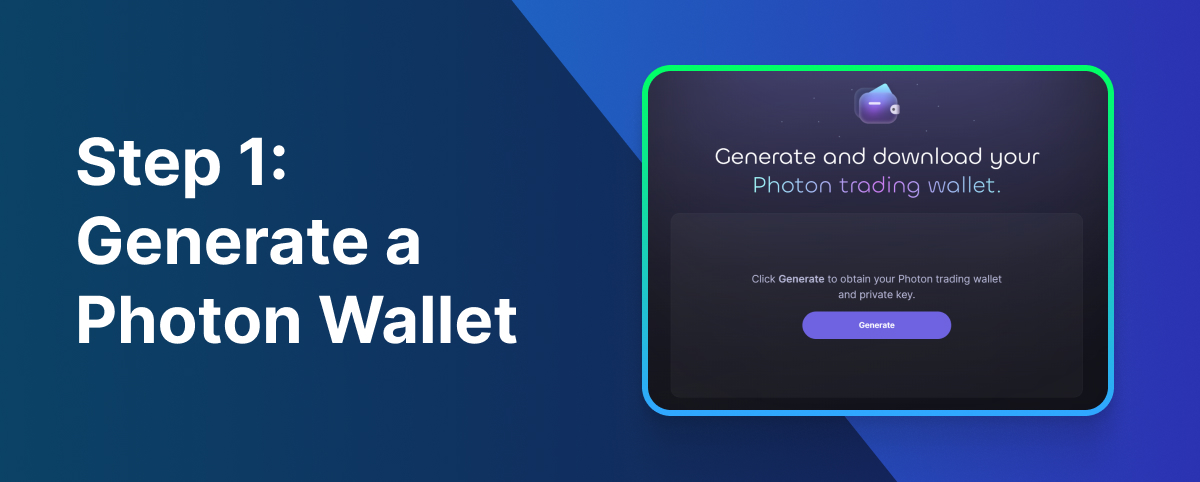
To start, visit: https://photon-sol.tinyastro.io/@solanageek and connect your Phantom wallet. I recommend connecting a burner wallet to Phantom to be safe.
Once connected click the generate button to generate a new Photon wallet.
Your private key will be revealed ONLY ONCE at this step. Save your private key in a safe place before clicking ‘Continue.‘
Step 2: Deposit Funds Into Photon

Now that you’ve got a Photon wallet, you need to deposit Solana into your Photon wallet. Copy your Photon address and deposit Solana into it.
Step 3: Customize Photon Settings
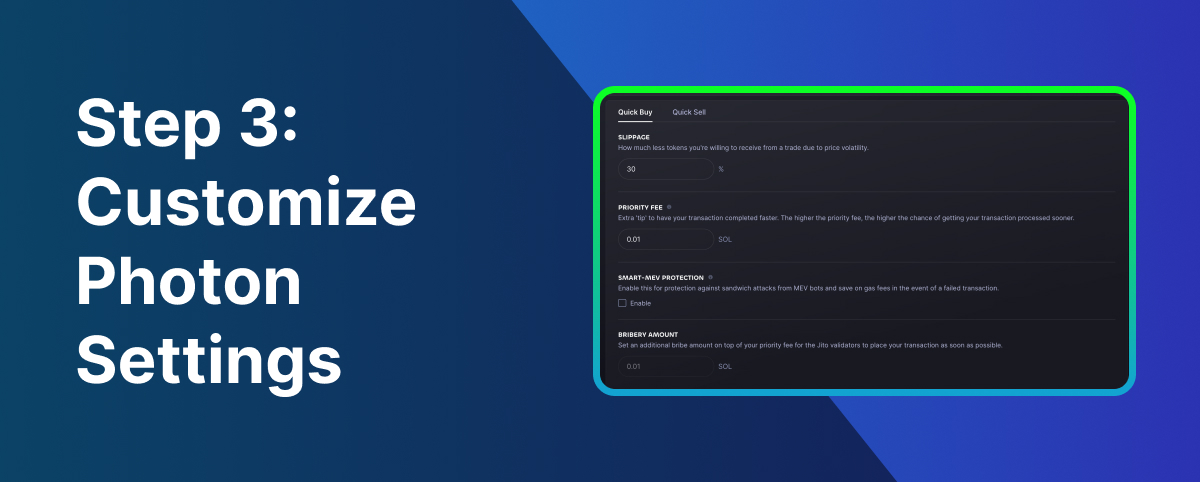
Before trading, let’s quickly customize our Photon settings. Go to the settings page. Over here you’ll be able to customize slippage, priority fees, quick buy buttons, and sell buy buttons. I typically leave slippage at 30% and priority fee at 0.01 SOL.
Step 4: View New Pairs
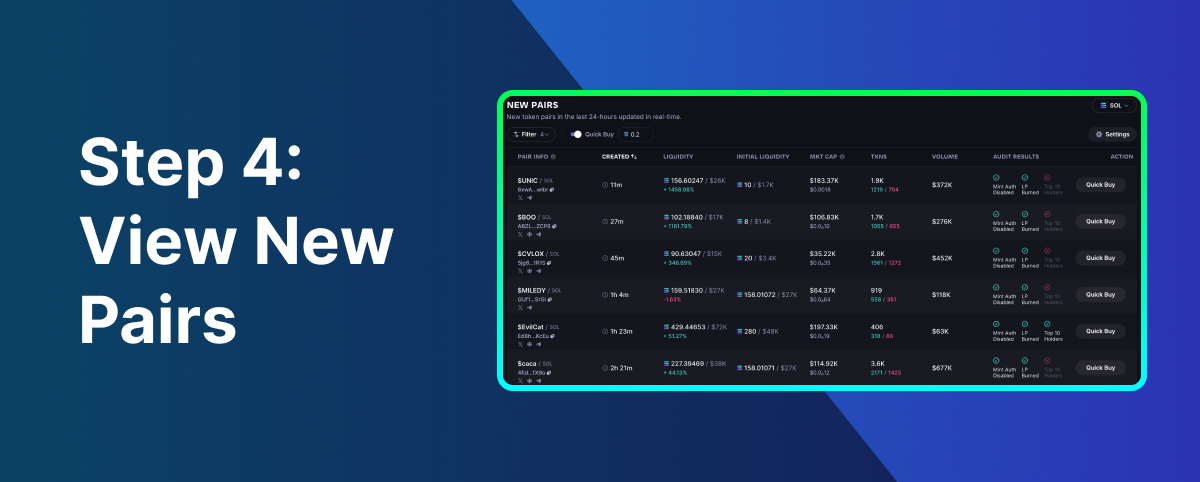
Now that you’re ready to trade on Photon, let’s go view the new pairs. Go to the new pairs page.
On this page you’ll be able to see all the newly created pairs. Trading on this page is extremely risky as most new coins dump. Luckily with Photon you can set filters to filter out rugs.

Click the filter button in the top left corner to access your filters. Here are the filters I trade with:
- LP Burned
- Mint Auth Disabled
- With at least 1 social
- Liquidity at least $10,000
Feel free to play around with filters to find what brings you the best results. Filters will give you a fighting chance of surviving in this wild west of meme coins.
Step 5: Buying and Selling Coins
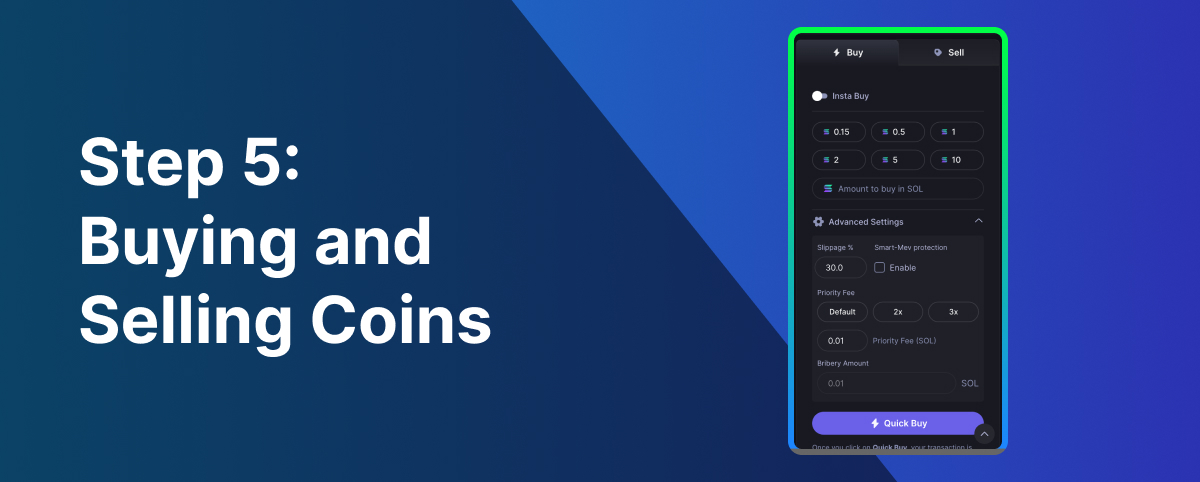
Once you find a coin you like, click into it to view more details. You’ll now be able to see a chart and more information regarding the coin. Once you’re ready to buy, choose how much you want to buy, set your slippage and priority fee, and then click Quick Buy. Photon will then attempt to purchase the coin using your SOL.
Once you’re ready to sell, go to the Sell tab. Choose the percentage you want to sell, slippage and priority fee, and then click Quick Sell. Photon will then attempt to sell the coin.
Step 6: View Your Holdings
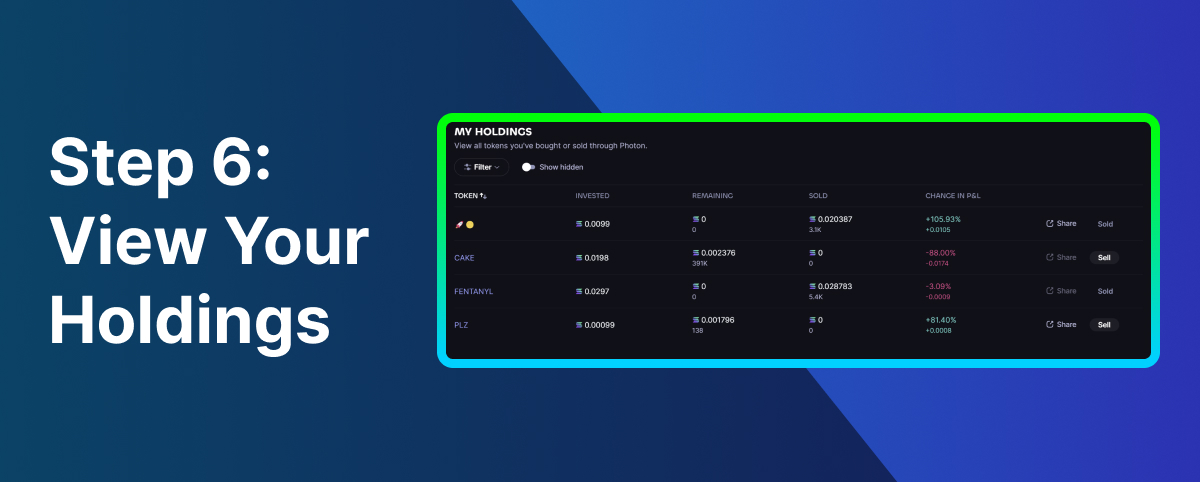
It’s easy to lose track of the different coins you’re buying and selling. Go to the Holdings Page to see your holdings. You can track your PnL on this page, and sell from
Congrats, you’re ready to use Photon! 🥳
You’ve now got everything you need to start trading on Photon. If you want to go even more in-depth on Photon, be sure to check out their full documentation: here.
If you found this article useful, feel free to share it with others! :)